Author Archives: gottaeatsf

TOMATO TIME :: Lemon Risotto with Roasted Cherry Tomatoes

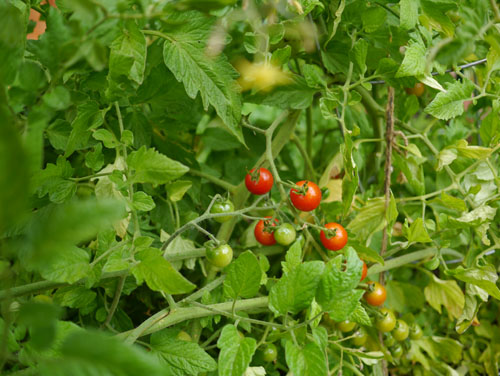
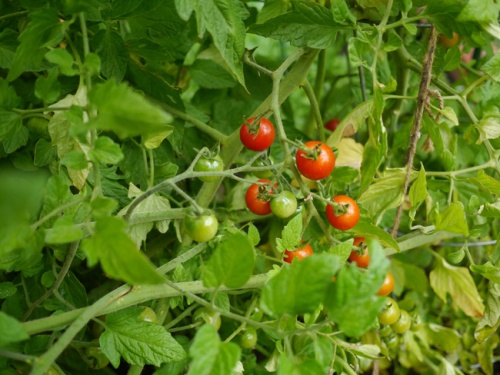
cherry tomatoes in the garden
Technically summer has come to an end, yet in the Bay Area the fall harvest summer is just beginning. Aaand, the cherry tomatoes keep on coming. I found this unique risotto recipe, which incorporates roasted cherry tomatoes. It is definitely strong on the lemon flavor, which I like, but be forewarned if you’re not a lover of lemon. This may not be the recipe for you. Recipe from Bon Appetit

Lemon risotto with cherry tomatoes

Lemon Risotto with Roasted Cherry Tomatoes

Ingredients:
12 ounces cherry tomatoes
3 Tablespoons olive oil, divided
5 cups (about) low-salt chicken or vegetable broth
2 Tablespoons butter, divided
1/2 medium white or yellow onion, finely chopped (about 1 cup)
2 cups arborio rice
2 garlic cloves, chopped
1 cup dry white wine
2 cups (loosely packed) baby arugula
1/2 cup finely grated Parmesan cheese
1 1/2 Tablespoon fresh lemon juice
2 teaspoons chopped fresh Italian parsley
1 1/2 teaspoons chopped fresh thyme
1 teaspoon chopped fresh rosemary
1/2 teaspoon finely grated lemon peel

Directions:
1. Preheat oven to 350. Place tomatoes on rimmed baking sheet. Drizzle with 1 tablespoon oil; sprinkle with salt and pepper. Toss to coat. Roast until skins begin to wrinkle, about 12 minutes. Set aside.
2. Pour 5 cups broth into small saucepan; bring to simmer. Cover and keep warm.
3. Melt 1 tablespoon butter with 2 tablespoons oil over medium heat in large saucepan. Add onion; saute until translucent, about 4 minutes. Add rice and garlic; sprinkle with salt and pepper. Stir 2 minutes. Add wine; stir until almost all the liquid is absorbed, stirring frequently and adjusting heat if necessary to maintain gentle simmer, about 5 minutes. Continue to add broth by cupfuls, stirring often, until rice is tender, about 25 minutes total.
4. Remove from heat. Stir in 1 tablespoon butter and all remaining ingredients. Fold in tomatoes. Season with salt and pepper.

cooking risotto

Greek Salad the Greek Way (or so I hear)

greek salad
I’ve never been to Greece, but my sister-in-law has. She told me that every time she ordered a “salad” while on the trip, it came without lettuce and instead focused on the tomato, cucumber, and peppers. Given that my garden is happily producing these three ingredients, I was immediately on board. The key is the combination of vegetables with olives and feta cheese and a highly lemony dressing. Next time I’ll do more research and give some proper facts and history, but for now I’m too busy eating my big Greek salad.

Greek Salad Recipe

Ingredients:
2-3 medium sized tomatoes, cored, sliced into wedges and again into medium sized chunks
1 cucumber, peeled and sliced in half lengthwise twice and sliced crosswise
1 gypsy pepper (red, orange or yellow), chopped in medium to large pieces
1 small red onion, sliced crosswise and chopped medium
Handful of pitted kalamata olives, rinsed and chopped in halves or quarters
Feta cheese

Dressing:
1/4 (scant) cup olive oil
Juice of 1/2 – 1 meyer lemon
Salt and pepper

Directions:
1. Prep and combine vegetables and olives.
2. Whisk the dressing ingredients and toss with vegetables.
3. Serve with crumbled Feta cheese on top or sliced on the side.

Notes:
– I know some people don’t like raw red onion, but in this instance, the added bite is a nice and in my mind necessary, complement to the other flavors. That said, you may not want to eat this before, say, an interview or a first date.
– As vegetables vary in size, you’ll need to eyeball ratios. The main idea is equal parts tomatoes, cucumbers, and peppers.
– Optional: Add 1 small clove garlic, crushed or chopped small, in with the dressing.

tomatoes in the gardenGypsy pepper red pepper on the vinecucumber in the garden

Padron Peppers

Padron Peppers

Padron peppers, fried with a heavy hand of salt, are surprisingly simple to make and provide a highly satisfying snack. Like potato chips, sometimes we need a vehicle for salt and these peppers deliver in spades. It’s best to get them early in the season before they get too hot in the spicy department. I have only experienced this once, and it’s a sad occasion when they’re inedible. Most of the time while you might have one or two hot ones in the bunch, you will find they have just the perfect amount of bite to keep you interested without putting your taste buds out of order. Keep an eye out for them at the farmers market mid to late summer, early fall. Serve in the backyard with a corona on a warm evening while prepping the grill.

Ingredients:
Large handful of padron peppers
1 Tablespoon of olive or grape seed oil
Kosher salt

Directions:
1. Heat oil in a saute pan over medium high heat until hot, about 1 minute.
2. Add peppers and keeping a constant eye on them allow them to lightly blacken, flipping and rotating on occasion to ensure they cook uniformly.
3. Once they’re completely cooked, aka. softened, remove from pan and place momentarily on a paper towel to rest.
4. Toss with salt, transfer to a serving plate and enjoy while still warm.

Cooking padron peppers PadronPeppers_InPan_2_FWPadronPeppers_3_FW

TOMATO TIME :: Fresh Tomato Salsa

Basic Salsa

I like to make this salsa with a variety of tomatoes, especially with an heirloom or two to add color, interest and flavor. Any tomatoes will do as long as they’re ripe. Whatever you have on hand.

Basic Salsa Recipe

Ingredients:
3-4 ripe tomatoes, cored and chopped small
2 small torpedo onions or shallots or 1 small red onion, chopped small
1 garlic clove, peeled and chopped small
1 jalapeno, chopped small
Juice of 1/2 lime
1 Tablespoon chopped cilantro
Kosher salt and pepper

Directions:
1. Prepare and combine all ingredients. Stir well, add generous salt and pepper.
2. Taste and adjust seasoning as needed.
3. Serve immediately with tortilla chips.

Tomatoes on the vine

JalapenoPlant_FW

Salsa_Basic_Closeup_FW

TOMATO TIME :: Slow Roasted Tomatoes (aka. Flavor Bombs)

Tomatoes_Harvest_1_FW

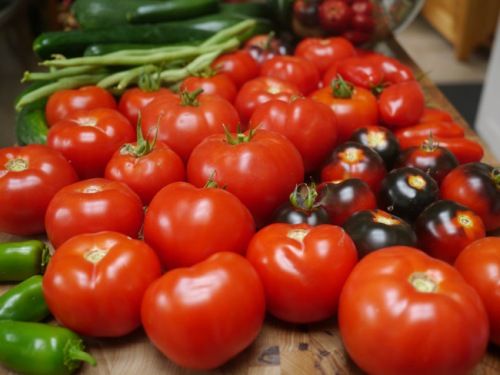
It’s the time of year we’ve all been waiting for – finally, tomatoes are in season! After suffering from a dearth of garden tomatoes in foggy San Francisco, I am now experiencing the opposite in Marin – tomato heaven! Still, with truck loads of tomatoes all ripening simultaneously, suddenly one begins to wonder – what can I DO with all these tomatoes? The answer is – the sky’s the limit! I’ve been simmering vats of tomato sauce,which I’ve stashed in quart jars in the freezer for later use. You might also invest in canning equipment if you’re up for the challenge. Other lovely options include fresh homemade salsa, ratatouille, caponata (a personal favorite), or as follows, slow roasting!

SlowRoastedTomatoes_1_FW

SLOW ROASTED TOMATOES

These slow roasted tomatoes are absolutely delicious. A wonderful option for a Sunday afternoon since the roasting takes about 3 hours. Or if you work from home, put them in around 3 or 4pm for an evening supper. Coarsely chop roasted tomatoes and serve on pasta, say spinach linguini, with the roasted garlic (removed from skins). Optionally, add fresh spinach or basil and chopped zucchini (briefly sauteed in a touch of olive oil for 1-2 minutes). Alternatively, store them in the fridge with a little extra olive oil for later snacking. (Serve with crusty, toasted bread – yum!)

SlowRoastingHeirloomTomatoes_2_FW

Ingredients:
A variety of heirloom tomatoes
Whole gloves of garlic, unpeeled
Extra Virgin olive oil
Herbs such as thyme or rosemary (optional)

Directions:
Preheat oven to 225°F. Slice each tomato into thick slices and arrange on a parchment-lined baking sheet along with the cloves of garlic. Drizzle a touch of olive oil, and add a pinch of salt, pepper and herbs if you like.

Bake the tomatoes in the oven for approximately three hours. You want the tomatoes to be shriveled and dry, but with a little juice left inside–this could take more or less time depending on the size of your tomatoes.

SlowRoastedTomato_SpinachLinguini2_FW

Udon Noodles in Broth with Enoki Mushrooms and Vegetables

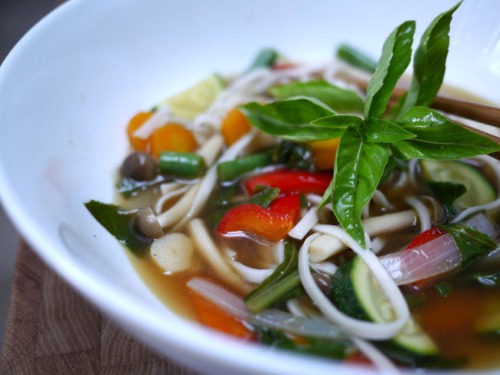
UdonNoodlesEnokiMushroomsInBroth_FW8

A flavorful, satisfying hot, slurping noodle-soup. Best to cook the noodles while prepping all the ingredients so that everything is ready to go since the vegetables cook quickly. The ingredient list and directions may look more daunting than the reality. This is basically a quick stir fry served in a broth with noodles. The jalapeno adds a nice kick.

Serves 2.

Ingredients:
-2 bundles udon noodles, cooked
-1 teaspoon grape seed or vegetable oil
-1 heaping teaspoon powdered ginger
-1/2 yellow onion, sliced thinly
-1 carrot, sliced
-1/2 red or yellow pepper, sliced in 1 inch pieces
-1 small or 1/2 large jalapeno, chopped
-2 cloves garlic, sliced thinly
-1 zucchini, halved lengthwise and sliced
-1 small bunch beet greens (or chard), cleaned and chopped into 1 inch pieces
-1 bunch enoki mushrooms, separated (or handful of sliced white mushrooms)
-1 handful green beans, cut into 1/2-1 inch pieces
-1-2 splashes Mirin
-1 quart homemade vegetable stock
-1 Tablespoon Shoyu (or soy sauce)
-1 Tablespoon Ponzu (if you have some on hand)
-salt and pepper
-sprig of fresh basil

Directions:
1. Boil water in large pot and cook udon noodles according to package directions. Rinse cooked udon thoroughly with cold water and set aside.
2. Separately, boil some water in a kettle and pour hot water into two serving bowls to heat. (optional)
3. Heat oil in large saute pan. When it starts to sizzle slightly, add the powdered ginger and stir it into the oil.
4. Add the chopped onion and carrots and cook over medium heat stirring frequently for about 5 minutes or until the onion is translucent and the carrot is softening.
5. Add the red pepper and saute a couple minutes until starting to soften.
6. Stir in the jalapeno and garlic and cook briefly (30 seconds or so). Add a splash or two of mirin and cook down in a minute or two.
7. Add the vegetable stock and bring to a boil. Stir in the zucchini, beet greens, mushrooms and beans. Stir in the Shoyu and Ponzu, cover and cook for 2-3 minutes or until the vegetables are just cooked.

AsianDish_CookingInStock_FW
8. Taste and adjust seasoning, adding a bit of salt and pepper or additional shoyu if needed.
9. Remove water from serving bowls and dry. Place a portion of noodles in each dish then ladle broth with vegetables over the noodles. Using chopsticks, lightly stir noodles into the broth. Top with fresh basil and serve immediately. Eat noodles and veggies with chopsticks and slurp broth with Asian-style soup spoons.

EnokiMushroomsVegetablesInBroth_FW6

UdonNoodlesEnokiMushroomsInBroth_FW10

Simple Summer Garden Salad for a Light Lunch

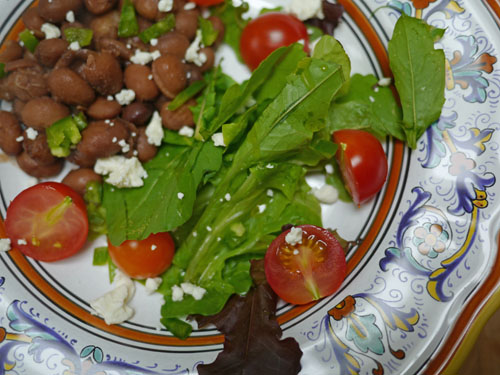
GardenSummerSalad_Closeup_2_FW

Ingredients:
– Handful of mixed lettuce and large leaf arugula
– Red and sun gold cherry tomatoes, sliced in half
– 1 small or 1/2 large jalapeno, coarsely chopped, somewhat de-seeded
– Warmed pinto or Rio Zape Heirloom Beans
– Crumbled feta or cotija cheese
– Olive oil
– Kosher salt & black pepper

JalapenoPepperPlant_FW

Directions:
1. Gather vegetables from the garden. Clean and dry thoroughly in strainer or salad spinner.
2. Slice & chop vegetables.
3. Place lettuce pieces on plate. Lightly toss with a pinch of kosher salt. Add cherry tomatoes and drizzle a bit of olive oil over the top.
4. Place ~1/2 cup warmed beans (strained with slotted spoon) next to lettuce.
5. Add jalapeno over the top and sprinkle with cheese and black pepper.
6. Serve immediately.

Arugula_Lettuce_FWSunGoldCherryTomatoes_3_FWSummerSaladIngredients_2_FWPotOfBeans_1_FWSalt_5_FW

OliveOil_2_FW

GardenSummerSalad_Barebones_FW

GardenSummerSalad_4_FW

Pot o’ Beans for Salads and Tacos

PotOfBeans_2_FW_cr1

These Rio Zape Beans resemble pinto beans, but are larger and profoundly satisfying. A great element to have on hand for quick tacos or served with a green salad to add flavor and sustenance.

Ingredients:
– 1 or 2 cups dried Rio Zape Rancho Gordo Heirloom Beans, washed and soaked for six hours in 1-2 quarts water (if 6 hours pass, drain the beans, reserving the soaking liquid and keep both on hand covered for up to 2 hours until you’re ready to start cooking.)
– 1 large onion, cut in half
– 1 or 2 celery stems, cut thirds
– 1 or 2 carrots, cut in half or thirds
– 2 garlic gloves, lightly peeled
– 1 bay leaf
– 1 bouquet garni of a few large parsley stems with leaves (tied with string in cheesecloth, net, sachet or coarsely chopped and stuffed into a large tea strainer)
– 1 teaspoon kosher salt or to taste
– 1/2 teaspoon pepper

Directions:
1. Place beans and soaking water into large saucepan. Add water if needed – the water level should be at least 1 inch above the top of the beans.
2. Add the onion, celery, carrot, garlic, bay leaf and parsley bouquet and bring to boil.
3. Reduce heat, cover and simmer one hour.
4. Remove the parsley sachet and celery, then add salt to taste and simmer for another 30 minutes to an hour, until the beans are completely tender.
5. Drain through a strainer set over a bowl, reserving the liquid. Remove the remaining vegetables and bay leaf and discard.
6. Adjust salt to taste, add pepper.
7. Serve warm in tacos embellished to your taste or along with a mixed green salad with freshly chopped parsley /or cilantro & feta /or cojita cheese.

Notes: Beans will last for 3-4 days in the refrigerator. Store so they are just covered with some of the reserved liquid, which should be used to reheat them as needed. Save any additional reserved liquid in a canning jar – label/date and freeze for future use. Makes a fantastic “vegetable stock” for asian noodles or soup. Cooked beans can also be frozen in liquid for future use.

Quick, Easy Breakfast – Fried Egg with Arugula and Kalamata Olives

Fried Egg with Arugula and Kalamata Olives

Spring is in full swing, and the arugula is growing like a weed on my deck garden. My new favorite (and quick) breakfast is a fried egg on arugula. Every morning I go out and pick 5-6 or the largest leaves, clean & dry them thoroughly, sprinkle with salt and drizzle with a bit of olive oil. Chop 2-3 pitted kalamata olives and fry a fresh market egg (1-2 minutes) to put on top. Easy, simple and delicious!

Arugula Growing in the Deck Garden

A New Favorite- Chick Pea Salad

Chick Pea SaladI had something like this chick pea salad at ‘wichcraft, a lunch spot in San Francisco at Mission and 5th Streets downtown. I was bewitched. Here’s my version- it’s my new lunch obsession.

Garbanzo Beans

Serves 2.

Ingredients:
olive oil
pinch of cayenne pepper
3 shallots or 1 small red onion, chopped finely
1 large garlic clove, minced
2-3 celery sticks, cleaned, halved lengthwise and sliced
2-3 shakes ground coriander (~1/2 teaspoon)
2-3 shakes ground cumin (~1/2 teaspoon)
1 pint cooked garbanzo beans, about two cups (or 1 – 14oz can chick peas, drained & thoroughly rinsed)
juice of one meyer lemon
kosher salt & pepper
2 (generous) Tablespoons freshly chopped cilantro or parsley (I use both.)

Saute chick peas with shallots and celeryDirections:
1) Heat 1 Tablespoon olive oil in small saucepan. Add pinch of cayenne pepper.
2) On medium heat, saute the shallots & celery for 1-2 minutes or so until slightly softened.
3) Add the garlic and stir, cooking for another minute or so. Add the cumin and coriander. Stir and add a touch more olive oil.
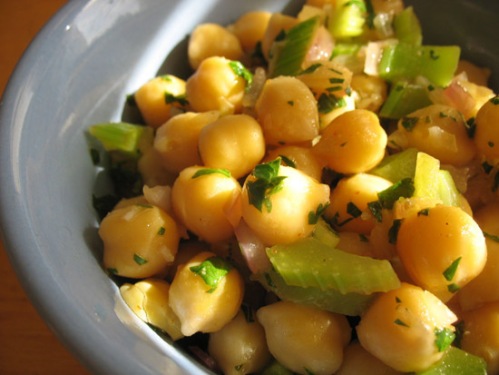
4) Stir in the chick peas and mix thoroughly.
5) Mix in fresh juice of 1/2 lemon. Generously sprinkle with kosher salt. Taste. Stir and repeat with second half of lemon or adjust to taste.
6) Add a bit of freshly ground pepper if desired. Stir in chopped cilantro & parsley and serve immediately, slightly warm.

This chick pea salad is great on its own as a side or I often serve it on top of a tossed salad. See below.

Chick Peas with Mixed Greens SaladGarbanzo Beans salad for lunchIngredients:
Mixed greens or arugula (2-3 cups), cleaned and dry
Crumbled goat cheese (feta would work too)
One green onion, sliced
1/2 avocado, sliced
for dressing: kosher salt, olive oil, & red wine vinegar

Directions:
1) Place greens in a bowl. Lightly sprinkle with kosher salt and then drizzle a bit of olive oil over the leaves. Add a splash of red wine vinegar and toss to coat evenly.
2) Add goat cheese, green onion, avocado and a mound of chick pea salad on top.
3) Lunchtime!

Note: I prefer to use dried garbanzo beans. After soaking & cooking the chick peas, I put them in pint mason jars and stash them in the freezer to use as needed.

Chick Peas on Arugula Salad